I started my sourdough journey well over a year ago. I found the idea of “growing” my own wild yeast and good bacteria for leavening bread fascinating. It sounded like a cool science experiment that ended with delicious bread and other baked goods to eat. The long fermentation process of sourdough can also make the bread easier to digest. As usual, when I get interested in a new topic, I dive in head first, gathered information and started mixing up my own sourdough starter, thinking how hard could it be? Well it took forever!!! Weeks and weeks of feeding it everyday, not seeing much for results, and wondering if I was doing something wrong. I would stare at it, wondering if it looked like it was growing, searching for various discard recipes to use the “buckets” of discard I was creating. I tried several times to make a loaf of sourdough, only to produce something that didn’t rise and looked like the offspring of a rock and a breadstick.
Finally, I took a break, stuck it in the fridge, and fed it once a week. After several weeks, I finally found the urge to try again, pulled it back out of the fridge, and low and behold I quickly had a sourdough starter that would easily double in size. It was a gooey monster that I aptly named Venom.
At some point I started posting about what I was making. As I have said before, I like making whatever I can, whether it be bread, a bed, or a backpack rack. I love sharing my making journey to help others realize that it isn’t hard and they can do it too. In the case of getting a sourdough starter going though, it did seem a little hard, or at least frustrating, so after getting lots of questions I decided to do it again.

Meet Hulk. Hulk is my second batch of sourdough starter and he was born in 10 days. It was soooo much easier this time around and I took plenty of notes so that it can be easy for everyone else too. Follow along and in about 10 days, you can enjoy some fresh sourdough bread as well.
THINGS YOU NEED
- Bread flour. Let me say that again – BREAD FLOUR. With Venom, I thought, I don’t need no stinkin’ fancy flour, I can just do this with all purpose flour. Don’t try it. Bread flour has a higher gluten content and that is what the little buggers in the sourdough starter need to feed on. It will help you be successfully and you will want it in the end for making delicious bread. If you have a Costco membership, you can get a 7lbs bag of King Arthur bread flour for super cheap. (You can use whole wheat or rye flour as well. Just don’t use all purpose flour unless you like a real challenge.)
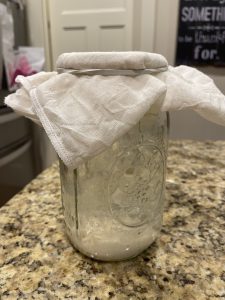
- A container for your starter to live in. I like to use a Ball 1 Quart Wide Mouth Mason Jar. Actually I have two so that once one gets a bit messy I can switch to the other one. Mason jars have some drawbacks. The main one being the threads for the lid can get all gummed up with flour. Whatever you get, make sure it holds at least 2 cups so that your sourdough dough has room to grow.
- Cheese cloth and a rubber band. This is what is going to cover your container. I picked up these 15×15 precut cheese clothes off Amazon. With my first try, I just put the mason jar lid on loosely, but with the cheese cloth you can keep the bad stuff from getting in, but it will allow lots of air to get in as well, which is where the good bacteria and yeast lives that we want to take up residence in our starter.
- Get a food scale, trust me. We have an older version of this Taylor Glass Top Food Scale on Amazon. This was another thing that I didn’t think I needed to bother with the first go around, but guess what? Not only is it more accurate, but it also means less dishes to wash. Yep, I bet I just sold you with that last tid bit. Instead of using tablespoons, teaspoons, and measuring cups, you just put everything carefully into a big bowl while watching the scale.
- A discard container. I just use one or two of these 2 Cup Rubbermaid containers. As you feed your starter you are going to discard some as well. If you didn’t, your starter would get huge and you would be feeding it a lot of flour to keep it going. Instead we discard some, but there is no need to throw it away. The internet is full of discard recipes to use that combination of flour and water that you are removing. I like to use this discard pancake recipe. It tastes great and uses up an entire cup of discard.
- I would highly recommend using filtered water. I just use what comes out of the fridge filter, but some people use a Berkey for filtering their water. (I’ve never used a Berkey, but they seem to be populate if you don’t have great tap water.) In the end, you are probably just fine using what comes out of your tap so I will count this one as optional but helpful.
- Lastly, you may also want to get a silicon jar spatula for scraping down the sides of your container and mixing. A jar spatula has a longer handle and narrower end for cleaning up the inside of you container, especially if you are using a jar. I just use a spoon, but I also end up annoying my wife when a spoon comes out of the dishwasher with some sourdough starter cemented to it.
That’s it. It’s not much of a shopping list to get you started on your way to fresh, delicious, sourdough bread. Now let’s dive into a few tips.
TIPS
- It’s best to pick the same part of the day each day to feed your starter. It may be the morning, it may be at night. Try to be consistent. One thing to note on this, if you decide to feed your starter before bed, you are most likely going to miss it increasing in size as you sleep. We want it to double in size, but it doesn’t stay doubled in size, it goes up and then goes back down. If you are sleeping you may get up in the morning and think nothing happened, especially if your container is a bit messy already so you can’t see the residue on the sides from it rising at night.
- You’re going to miss a feeding, it happens. Just don’t forget for too long. When you don’t feed your sourdough it sits stagnant and can start to grow mold or harmful bacteria. If you see something on the surface, then it’s time to throw it out and start over.
- Watch for hooch. Hooch is a cloudy liquid on top that is part of the fermentation process. There is nothing wrong with it, but it is a good sign that your starter is hungry. If you see hooch then give your starter an extra feeding.
- Starter likes a warm temp. This means as we get into the cooler and colder months, your house will get colder and it could take longer to get your start going.
- I like to warm my water up in the microwave a tad to take the cold off. Like I said, I use filtered water from the fridge so it is chilled. I’m not trying to get the water hot, I just stick it in for 35 seconds to take the chill off.
- Whether we are taking about starter or the dough, you’ll know when it has risen. I have spent plenty of time staring at both wondering if it had increased is size. Trust me, it is obvious in both cases if it did. You may not be able to tell if it exactly doubled, but you will have no doubt that it increased significantly in size. I have had plenty of times where my starter overflowed the quart size jar and made a mess.
That’s it for the tips. I provide them for guidance in your 10 day sourdough journey, but now it’s time to start that journey so get your container ready!
Day 1
32 grams of bread flour and 32 grams of warm water into your clean container you plan to use for your starter. Lots of recipes start out with a half or a full cup. 32 grams is about a 1/4 of a cup. If you start out with a lot, then you are feeding and discarding a lot. I’ve decide to use day one to just get something established.
Day 2
On day 2 we discard nothing, but we add another 32 grams of bread flour and 32 grams of warm water. Make sure to give it a good stir to get everything mixed together and cover it back up with your cheese cloth.
Day 3
It’s time to discard some so we don’t get our starter too big too quickly. You’ll want to discard 64 grams of starter into your discard container. One very easy way to do this is to put your entire container of starter onto the scale (except for the cheese cloth) and zero out the scale. Then start removing starter until your scale says -64. Make sure to give it a good stir before taking any out.
After you have removed your 64 grams of discard, it’s time to zero out that scale again, add 32 grams of bread flour, 32 grams of warm water, and give it a good mix while scraping down the sides as well.
If you are keeping track of your total, we started the day with 128 grams of starter and are back to 128 grams of starter. (About a half cup with 64 grams of discard in our container, or about 1/4 a cup of discard)
Day 4
Time to do it again. Just like day 3, we reduce by 64 grams, then add back in 32 grams of bread flour and 32 grams of warm water, making sure to get everything stirred in nicely.
Time to remind you about the hooch. I’m not going to say that you will see it by now, but you might. If you start to find a cloudy liquid sitting on top of your starter it means it’s probably hungry and you should give it an extra feeding. Just reduce by half and add the same amount back in. At this stage it would be reduce by 64 grams and add 32/32 grams of bread flour/warm water.
Day 5

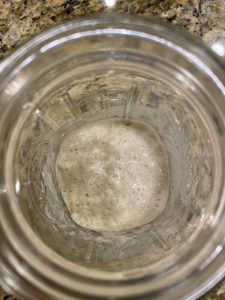
Hopefully you are seeing some bubbles on top of you starter at this point. now it is time to bump it up a notch. We don’t do any reducing today. We just add 64 grams of bread flour and 64 grams of warm water. Give everything a good mix and scrape down those sides.
If you’re calculating along, you now have 256 grams of sourdough starter.
Day 6
We always reduce by half so this time we are removing 128 grams of starter. Hopefully you are seeing a decent amount of bubbles on top at this point. Give it a good stir, remove 128 grams, and then add 64 grams of bread flour and 64 grams of warm water. Once again stir and scrape the sides. At this point we have hit the max amount of total starter we are going to have at any one point (256g). At this time I like to mark my mason jar with a piece of blue tape so the top of that piece of tape is inline with the top of the starter. Then I can easily tell how high my starter has increased.
Day 7
Hopefully you are now seeing it increase in size some after its feeding. This isn’t the baking soda and vinegar volcano you made in middle school so it won’t instantly bubble over as soon as you feed it, but somewhere between 4 and 8 hours after you do, you should be seeing it increase in size. Our goal is to get it to double in size. Once again we reduce by 128 grams and add 64 grams of bread flour and 64 grams of warm water. Don’t forget to stir and scape the sides.
Day 8
You’re going to start to notice a pattern here. Reduce by 128 grams and add 64 grams of bread flour and 64 grams of warm water. Stir and scrape. It’s time to watch it closely. Set a timer for 4 hours and take a look at what is happening, hopefully you have a sourdough that has doubled in size. If not, check again in 2 more hours.
Day 9
You should be seeing lots of bubbles at this point. Keep in mind, your starter doesn’t stay doubled in size. It bubbles up and then eventually goes back down at the end of its cycle. We’re going to once again reduce by 128 grams and add 64 grams of bread flour and 64 grams of warm water, stirring and scraping each time as well. Once again you need to watch it to see if is doubles in size. Check at 4 hours and again 2 hours later. Your sourdough should have doubled in size and be ready to start baking.
Day 10
Time to make bread. This assumes you starter is doubling in size on day 9. If not then keep repeating the Day 9 steps until it does. If at this point if it isn’t bubbling at and or very little, then you need to look at all the “inputs” you are putting into your starter and see if you can figure out where the problem is. Maybe your house is too cold, maybe your city water has a bit too much additives in it.

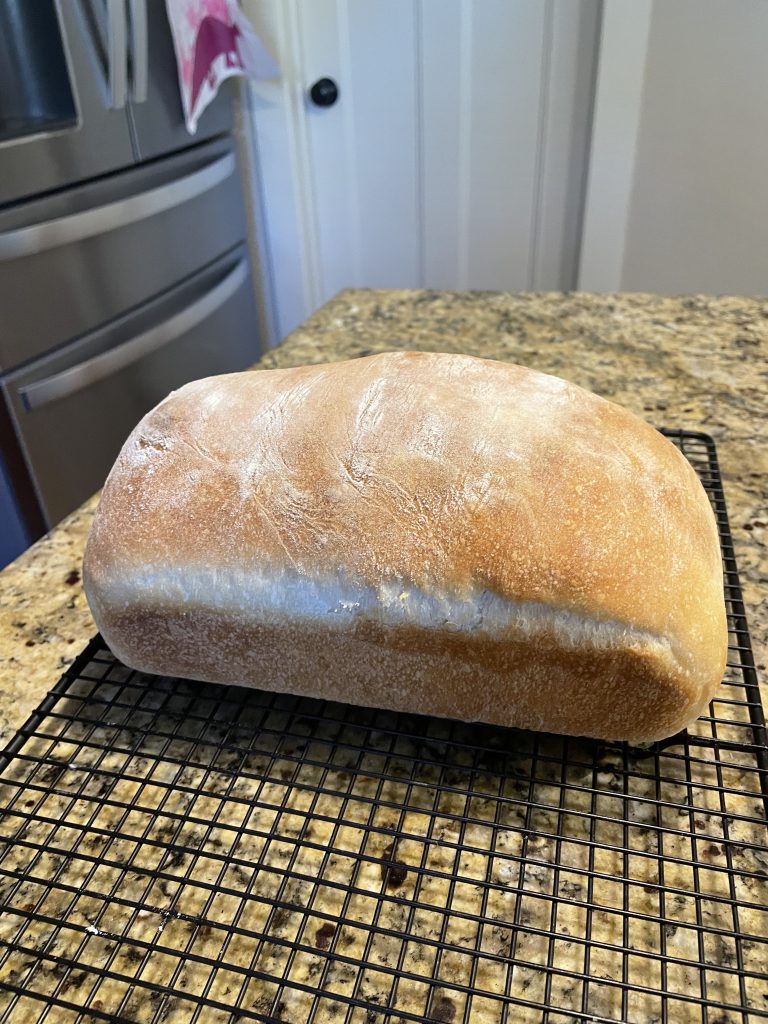
A good easy recipe to start with is this sourdough loaf bread recipe. It’s a great one to mix up the night before and let it rise over night. To do that you’ll want to plan ahead and feed your start around 6 hours before you plan to make the dough. For me that means I typically do a feeding between 12 and 1pm so it is nice and bubbly around 7pm when I mix up the dough and let it rise all night. Pictured here is the loaf I made with this starter after just 10 days. It turned out great! Not quite as developed as a loaf made with my original starter that has been growing for over a year, but it was still a great loaf of bread and was devoured quickly by the entire family.
The amount you feed before baking is going to depend on how much you need for the recipe. In the case of this sourdough loaf bread recipe, it needs 65g of starter, (i.e. 32.5 grams of flour and 32.5 grams of water). Since 65g is less than the normal discard amount, I would probably once again discard 128g and add back in 64g of flour and 64g of water. This is going to give you 256g of starter for baking. Once you use the 65g for the recipe, you’ll have around 191g of starter left, so then you will on need to discard 63g and refeed. I tend to play with these numbers a bit so that once I start baking, and have a strong sourdough starter, I am discarding very little. At times I’ve even emptied my starter and only had a tiny amount at the bottom, but when it is strong, that good bacteria and yeast easily reproduce, even from that little amount left in your container.
| Day | Discard Amount | Flour | Water |
|---|---|---|---|
| Day 1 | 32g | 32g | |
| Day 2 | 32g | 32g | |
| Day 3 | 64g | 32g | 32g |
| Day 4 | 64g | 32g | 32g |
| Day 5 | 64g | 64g | |
| Day 6 | 128g | 64g | 64g |
| Day 7 | 128g | 64g | 64g |
| Day 8 | 128g | 64g | 64g |
| Day 9 | 128g | 64g | 64g |
| Day 10 | BAKE! |
Wrap Up
Remember, your starter is young and it will continue to get stronger and stronger as the bacteria in it grows and multiples. You have 2 options at this point. You can leave it in a warm spot on your counter and keep feeding it daily or you can move it to the fridge and feed it once a week. If you aren’t baking daily then the fridge is a great option. It slows down the feeding of your starter so you are producing less discard and using less flour. This is what I do, then I simply pull it out of the fridge 6 – 8 hours before I want to make something and give it a good feeding.
Hopefully my 10 Day sourdough starter schedule works for you. The great thing is once you have a starter going it will last as long as you keep it maintained. I make one or two loaves of sourdough sandwich bread each week and they turn out great. As your sourdough starter matures it will rise stronger and quicker, producing delicious, fresh, homemade bread as well as other baked goods for your family to enjoy.
